
Greybox Altar
📅 2023-04-22
The loop for the runs in Mirrors has gone through quite a lot of changes since it’s inception during early development, since it was originally a little nebulous. I greyboxed it early on but haven’t gone back to expand it with the new concepts because it was already being built out for real in the levels themselves, using the procedural generators, etc. But this has put me in a spot where I have to build a little blindly and staple things together as I go, and I hate not having more control over my direction. Iteration occurs better when the loop is solidified, so today I’m using the new fleshed out loop that I have in the design document, and greyboxing it properly - before I commit to building out the things that will be needed for the system in reality. This should, in theory, point out any flaws in the central run loop so that once we get to fleshing it out iteratively I’m not stuck with things I don’t like.
So, what does this mean? New scene. New character controller. New scripts. Just for today, we’re ditching everything that’s built, to make sure our loop is strong as fuck boi. The lovely JeCase has a “Modular First Person Controller” on the asset store that I used last time, so we dont have to deal with the dependencies of the horror kit, and we’ll be using different colored boxes to represent items and simple item holders instead of an inventory to replicate item movement. The only system that is already present I may need to use is the rigidbody dragger, but I may even need to code my own quickly because I dont want to deal with how the rigidbody dragger is tied into every other script in Horror Kit. Plus, its pretty easy to just say “if rigidbody and mouse click, child to player transform forward, and if unclick, unchild”.
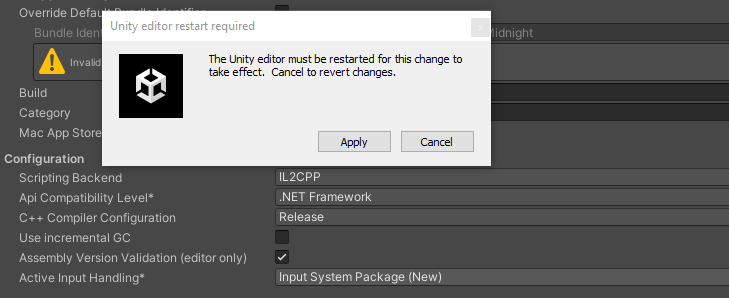
Let’s begin. And… we’ve already been thrown off by Horror Kit - see, Horror Kit uses the new Unity input system, and most Middleware uses the older Input system, which is what is happening now. Time to fix that I guess, and I might just allow the older input system to work while we’re grayboxing. I need coffee.
Okay we good. Movement is in. Thank you JeCase. Next step will be creating some simple item pick up and drop.
All we need is some simple rigidbody manipulation. What we dont need to do, is overcomplicate it by making it 30 scripts scattered across 30 items that are communicating with each other. Okay, maybe I’m still salty about Horror Kit. So here is a barebones script that uses on mouse down and on mouse up to basically disable the objects collider, give it a new position in front of player using an offset anchor collider on the player, and change it to kinematic so it isnt being affected by gravity. Super simple and pretty similar to how Horror Kit does it, just without the brain worms and/or rotation.

In fact, lets add some rotation. I’m just going to check if we’re holding the R key, and if we are, horizontal mouse input will spin the item. It’s a little jank because we’re also changing where we look on left and right but for now it does the job. We’re just greyboxing, and otherwise we’d need to go into the First Person Controller and just disable mouselook while we rotate. We can do it later if we really need to.
Actually, it’s too distracting, lets just make R rotate the object at a consistent speed and forget the mouse input.

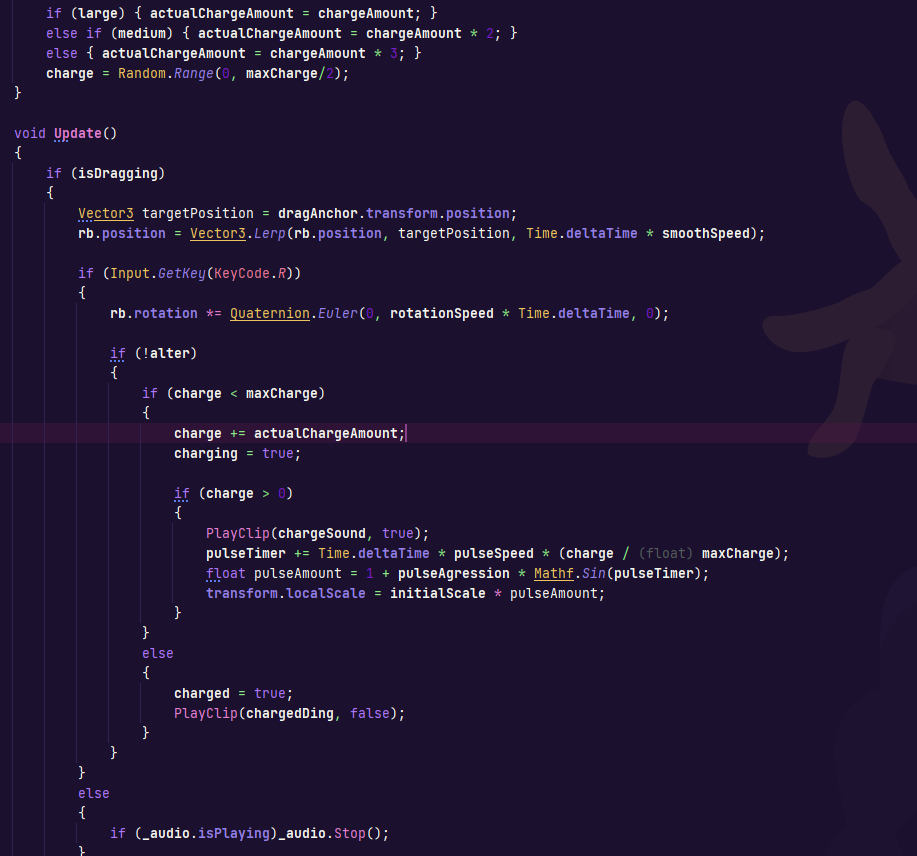
Perfect, okay that’s half an hour wasted on drag objects, let’s move on and have a look at the actual intended design here. So these items need a size bool, small medium and large and a charge integer. The size variable is so you can arrange an altar somewhat correctly, and the charge value is so you can charge the altar. Let’s charge the item while we’re rotating it in our hands, and we can set the item sizes in the inspector and just prefab them. I guess we need some way to know if the item is charging as well, we can maybe pulse it’s size? And since I dont want a charge text UI, maybe we pulse faster as we get closer to 100.
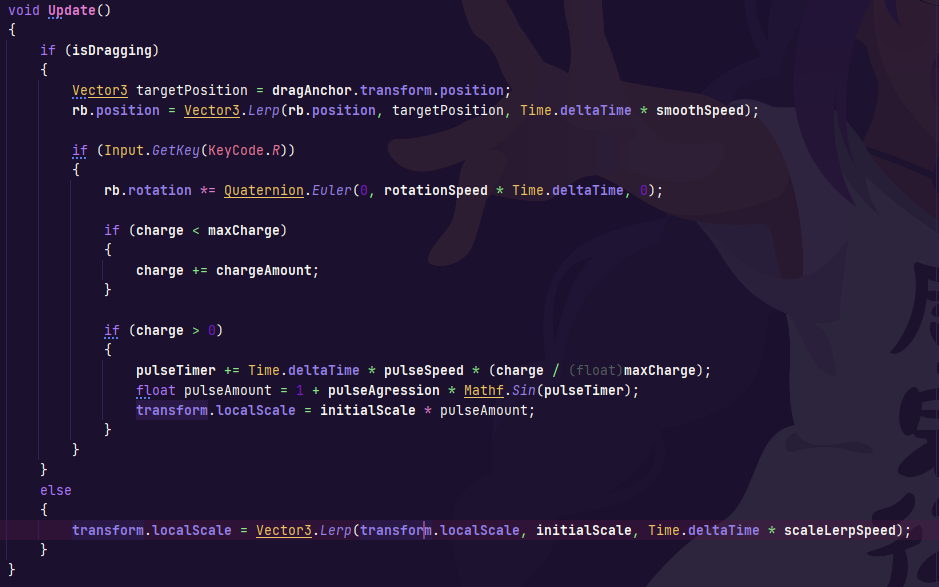
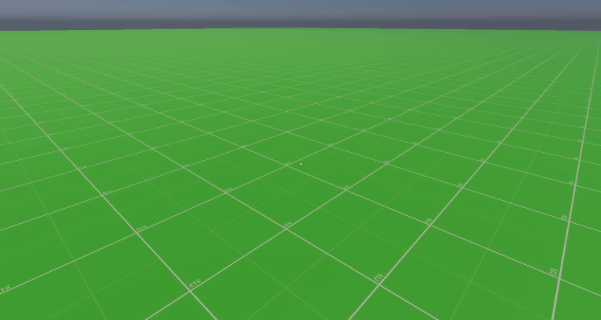
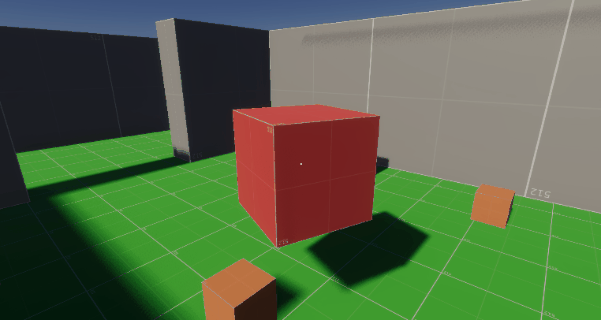
This took another 10 minutes but it’s looking pretty good, basically we just add a charge value to the item as we rotate it, then while the charge is greater than 0 and you are holding it, we move its scale between the initial scale and a calculated pulse scale that speeds up the more charged the item is. We then just lerp back to our initial scale on release. I also created a small emulation of the hallways using cubes just to get the overall feeling right.
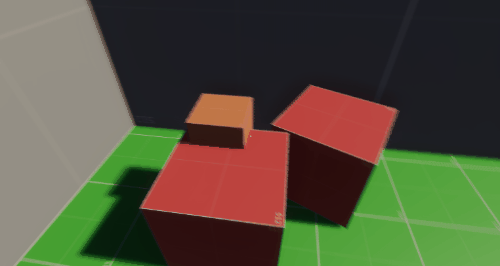
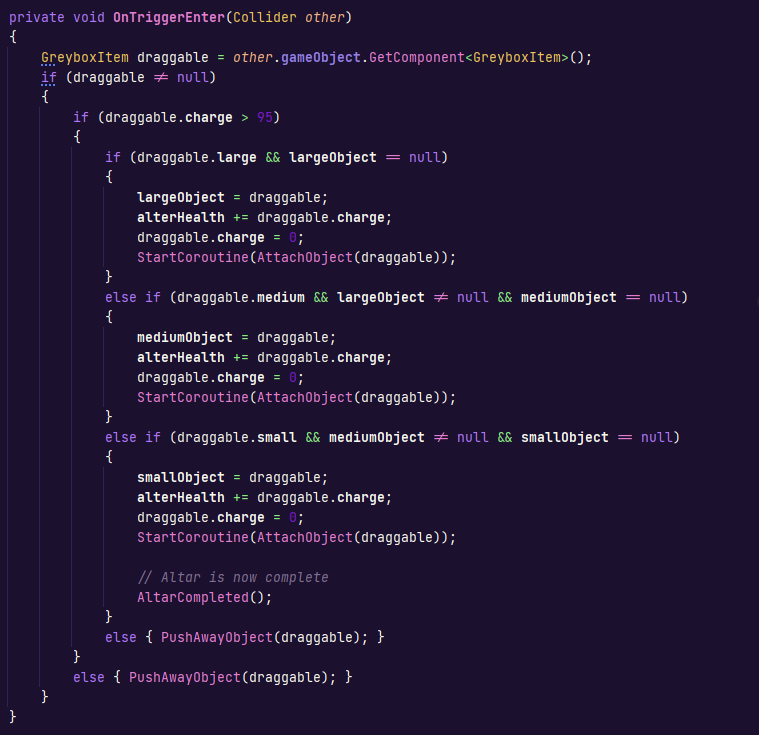
I also set it so when we hit max charge it stops pulsing, and adding a sound effect to charging and charged so we can have some player feedback. Okay more coffee, let’s get to the altar. What we want is a base object that can take 3 objects in order, based on some attribute, in this greybox instance, lets say its size. So when you drop an object on the altar, it will check if its the right kind of object (large, medium, or small) and either reject it, or accept it. If it rejects it, it pushes the object away with a little force, and if it accepts it, it disables the objects draggable script, attaches the object to the top of its collider, adjusts its collider to account for the new object, and waits for the next object. Rinse, repeat.

Uhh, okay, not quite. In the first gif we can see it basically works, but for some reason the altar doesnt drop as quick once attached to the other object, maybe because of mass? So lets combined the objects mass on the altar once it accepts a new object. We might want to just disable the rigidbody entirely on the object that gets attached to it too. As for the second gif, clearly our collider math is wrong. Let’s figure out what the heck is happening.
Wow okay that took… uh, like almost 2 hours? Whoops, so much for super quick greyboxing. I sort of got obsessed with getting the altar right, but to be fair, I needed to work out the best way to handle the altar at some point, why not now in the greybox, so I know how it’ll come together in the real project. I needed to fuck around and fiddle with it quite a bit. When we attach a game object now we grab its mass and rigidbody, turn it to kinematic, disable the original item script, rotate the object to its zero position with a yield return, set the object to be the child of the altar, calculate how to place it based on the bottom of its collider and the top of the altars collider, suck the object into the altars center spot, combine the mass of the object with that of the altar, destroy the items rigidbody, then begin the new collider calculation separately.

Essentially what we do here is figure out the new height of the collider based on the previous size of the collider, plus the new object, and a buffer to have it peak out just above the top. We also adjust the size of the altars collider on the x and z axis so it matches only the last item placed on it, so the items need to stack on top of each other correctly. It sounds simple but it took a while to figure out. Anyway, it’s working now, obviously it needs polish, the lerps need to be slower, there needs to be a cool effect as it happens. Obvious shit. But the functionality is good. Time for a break.
Ok, break done. Let’s add some features to the altar. We will only want charged items to be allowed to create an altar, so we’ll add a little check and if items aren’t charged to around 90% they bounce off. Now let’s create an altar health as well, and then when a charged item gets added, the charge of the item gets added to the altar health. This will give us a backbone for repairing altars. We will also go in and change the charge rate of items in the world depending on their size attribute, and randomly allocate a charge to every item in the environment on start up so its luck of the draw how much you need to charge it.
Time for the Gate, we’re greyboxing so lets keep it simple, I’ll make a little doorway out of primitives. And then once an altar is completed, we have to arrange them around the gate to power it up. To do this we add a checker method on the gate that calculates the distance of the completed alters and their angle. Then we make sure to add a call in the completed alters to run the check when they're ready

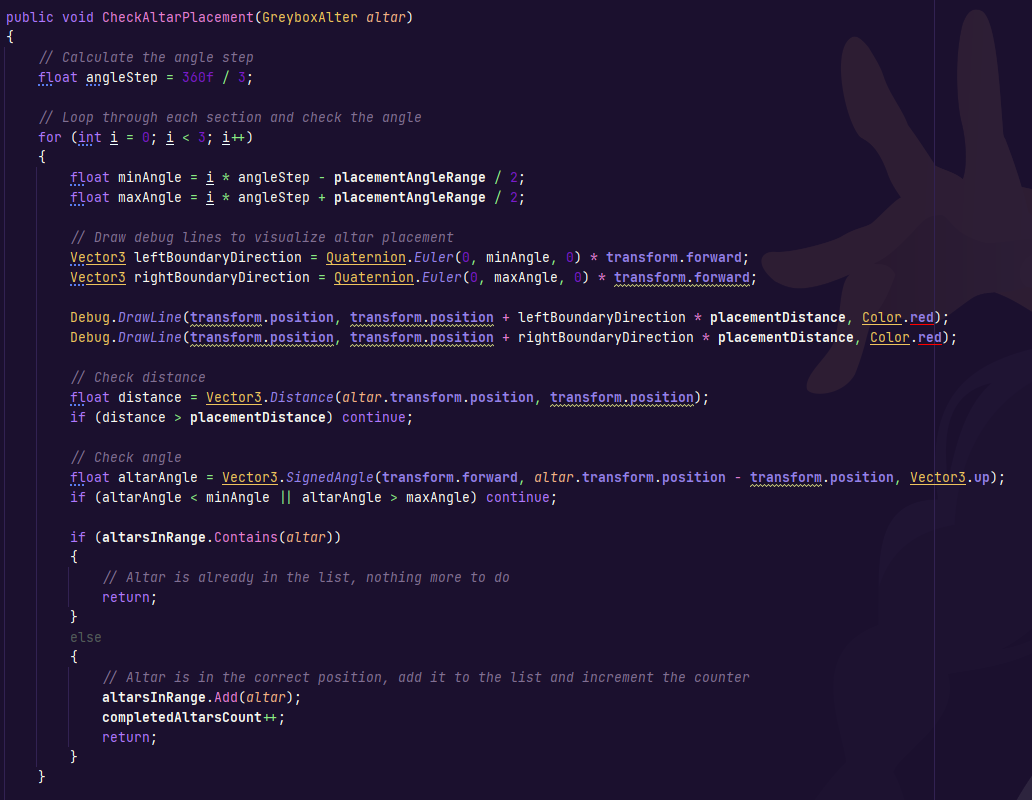
This took a bit of time to work out as well, I could have gone simplier on it and just had three semi-large trigger boxes that run the check instead, and that way I could have them be anywhere in a level, but this was the way I approached it off the bat and while it will need tweaking it... should work?
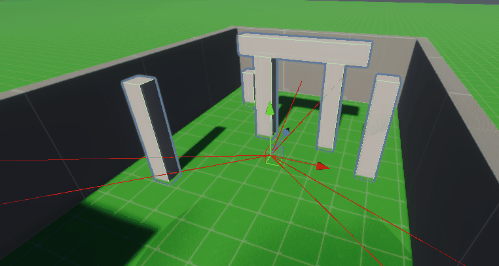
So… it’s uhhh - it’s certainly not perfect. I need to figure out the math a little more and honestly I may not want it to be around the gate, but in specific areas, but for greyboxing purposes, this works. And while we may not be through the loop yet this post has gone forever and there are so many gifs I’ll end up wasting all of neocities hosting space with one post so let’s leave it there.
Next we would clean up the altars a little, make them enter a new state when completed, so they can then have the player interact with them again once the gate is powered up, and then we can pass through the gate. We then need to create variations and play with the feel of it until it works that way I want it to before we extend the loop further. Then it's just expansion - add sounds, create altar items in various conditions around the level on generation - put in that repair functionality, add a little rng, expand on item types and how the altars interact with them, etc. We're on track though, now I'm just going to play through it for an hour and get a real sense of it.